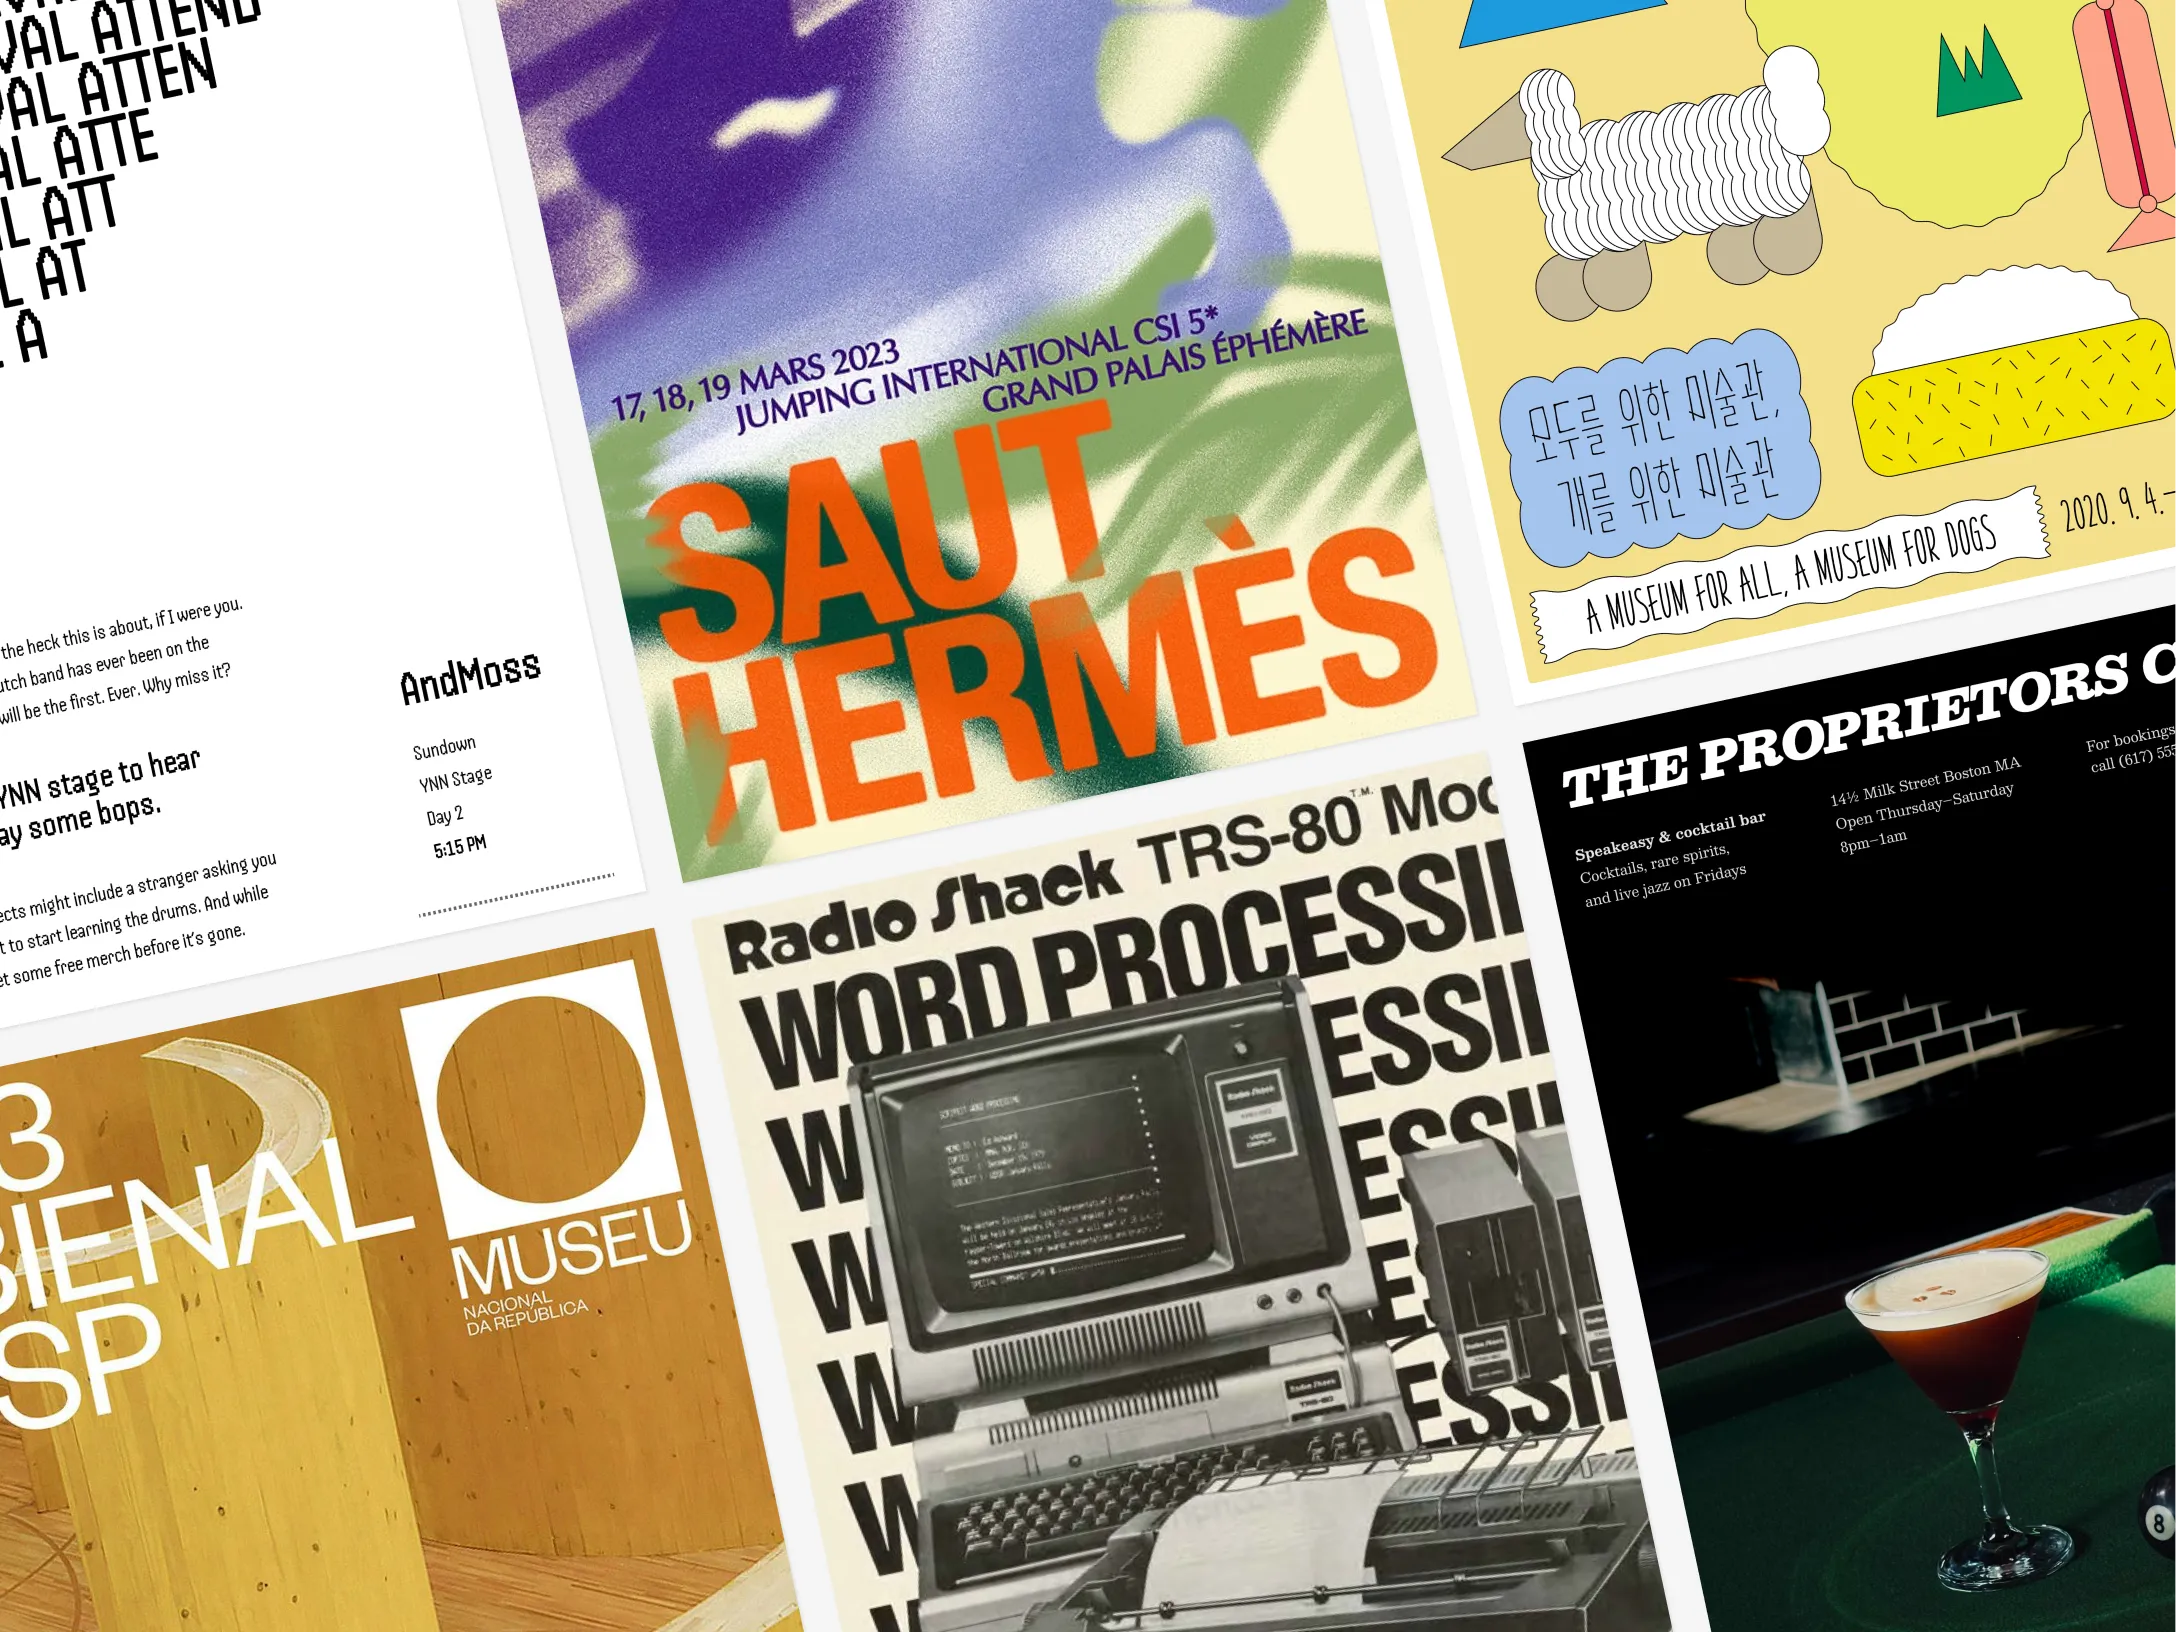
Walk into any café in your neighbourhood and take a look at the leaflet stand. You’ll see twenty A5 flyers, most of them crammed with text and identical in style (thank you, Mother Canva). The one you actually take home won’t be the loudest, it’ll be the one where it’s clear someone has put thought into.
Here are the three things that tell a good flyer apart.
1. The skeleton
Every print design of sorts that looks “professional” follows some kind of grid. That is, an invisible set of lines that hold everything in place.
A common starting point is a 12x12 grid, which divides your canvas into 12 rows and 12 columns you can snap elements to. Some designers go denser. Others also add a small gap (called a gutter) between each row and column. But don’t worry, you don’t need to pick up a book on grid theory to design a flyer that’s gonna make people go “whoa.”
This is the key thing to understand: the heaviest element on your page is where the reader’s eye goes first. This might be a bold headline, a striking photo, or a funky illustration.
That element attracts attention AND guides the eye toward everything else on the page. In fact, each element (text block, image, shape, etc.) is like a magnet. Its edges create invisible lines that pull other elements toward them. When things align to those lines, a layout feels less scattered and more intentional, even if you can’t immediately explain why.
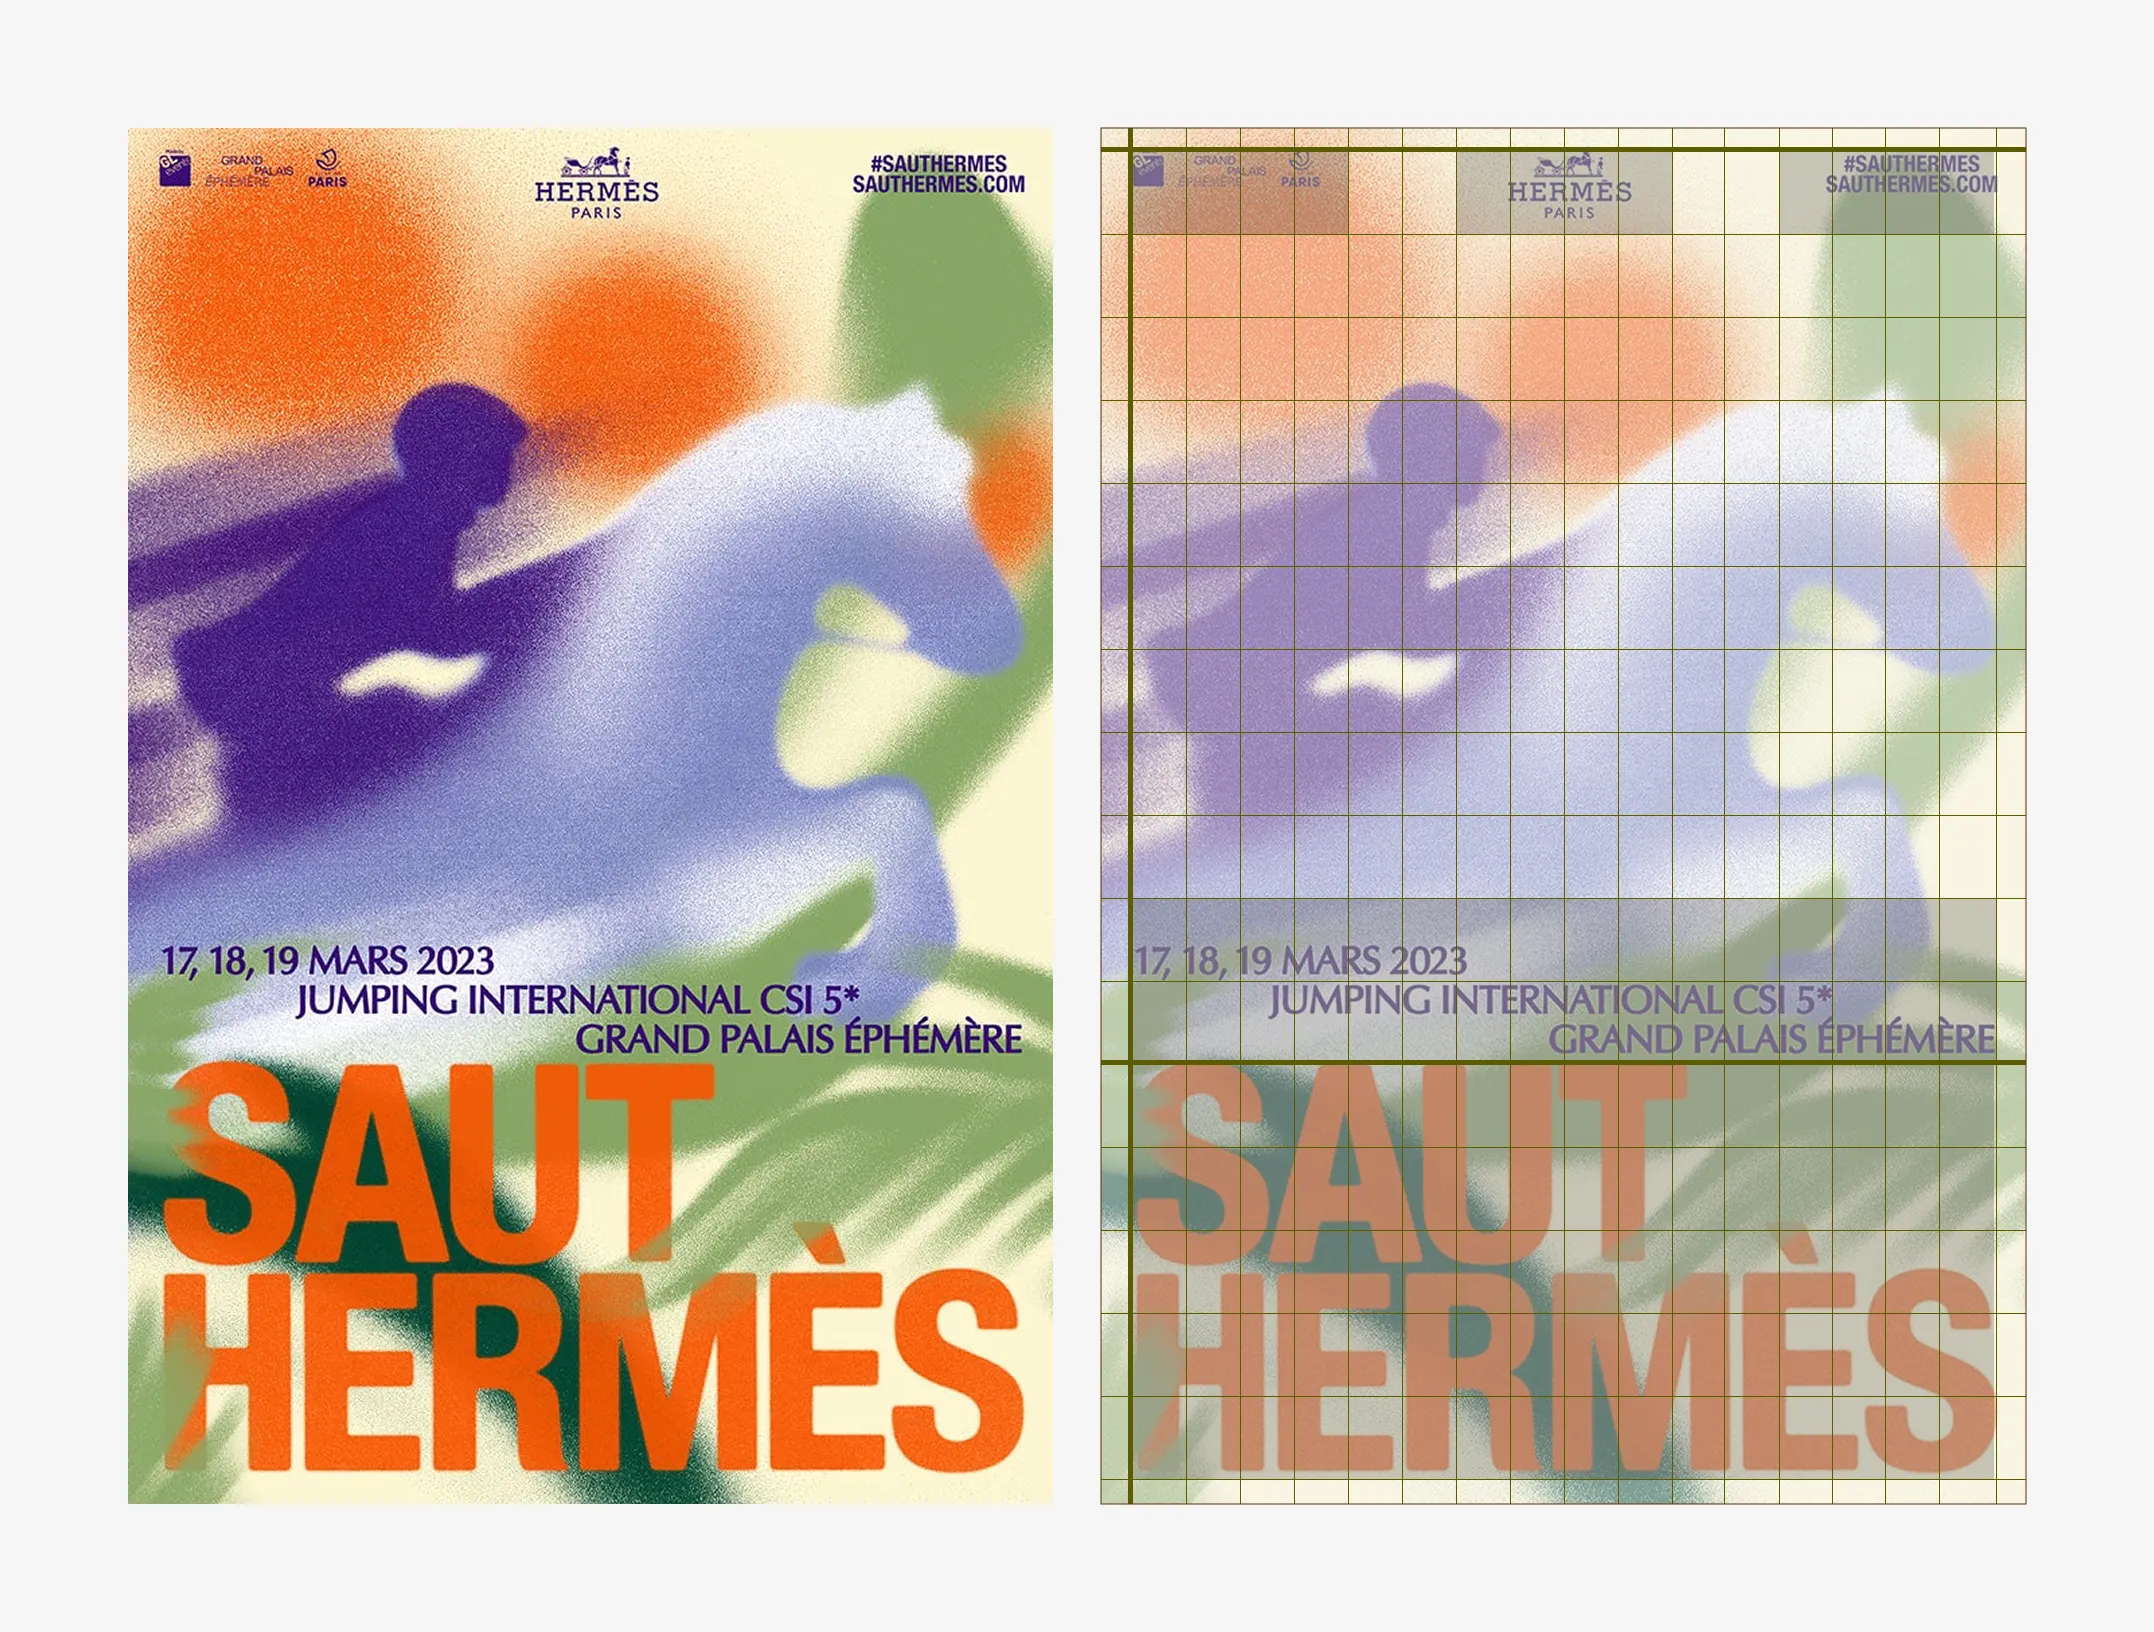
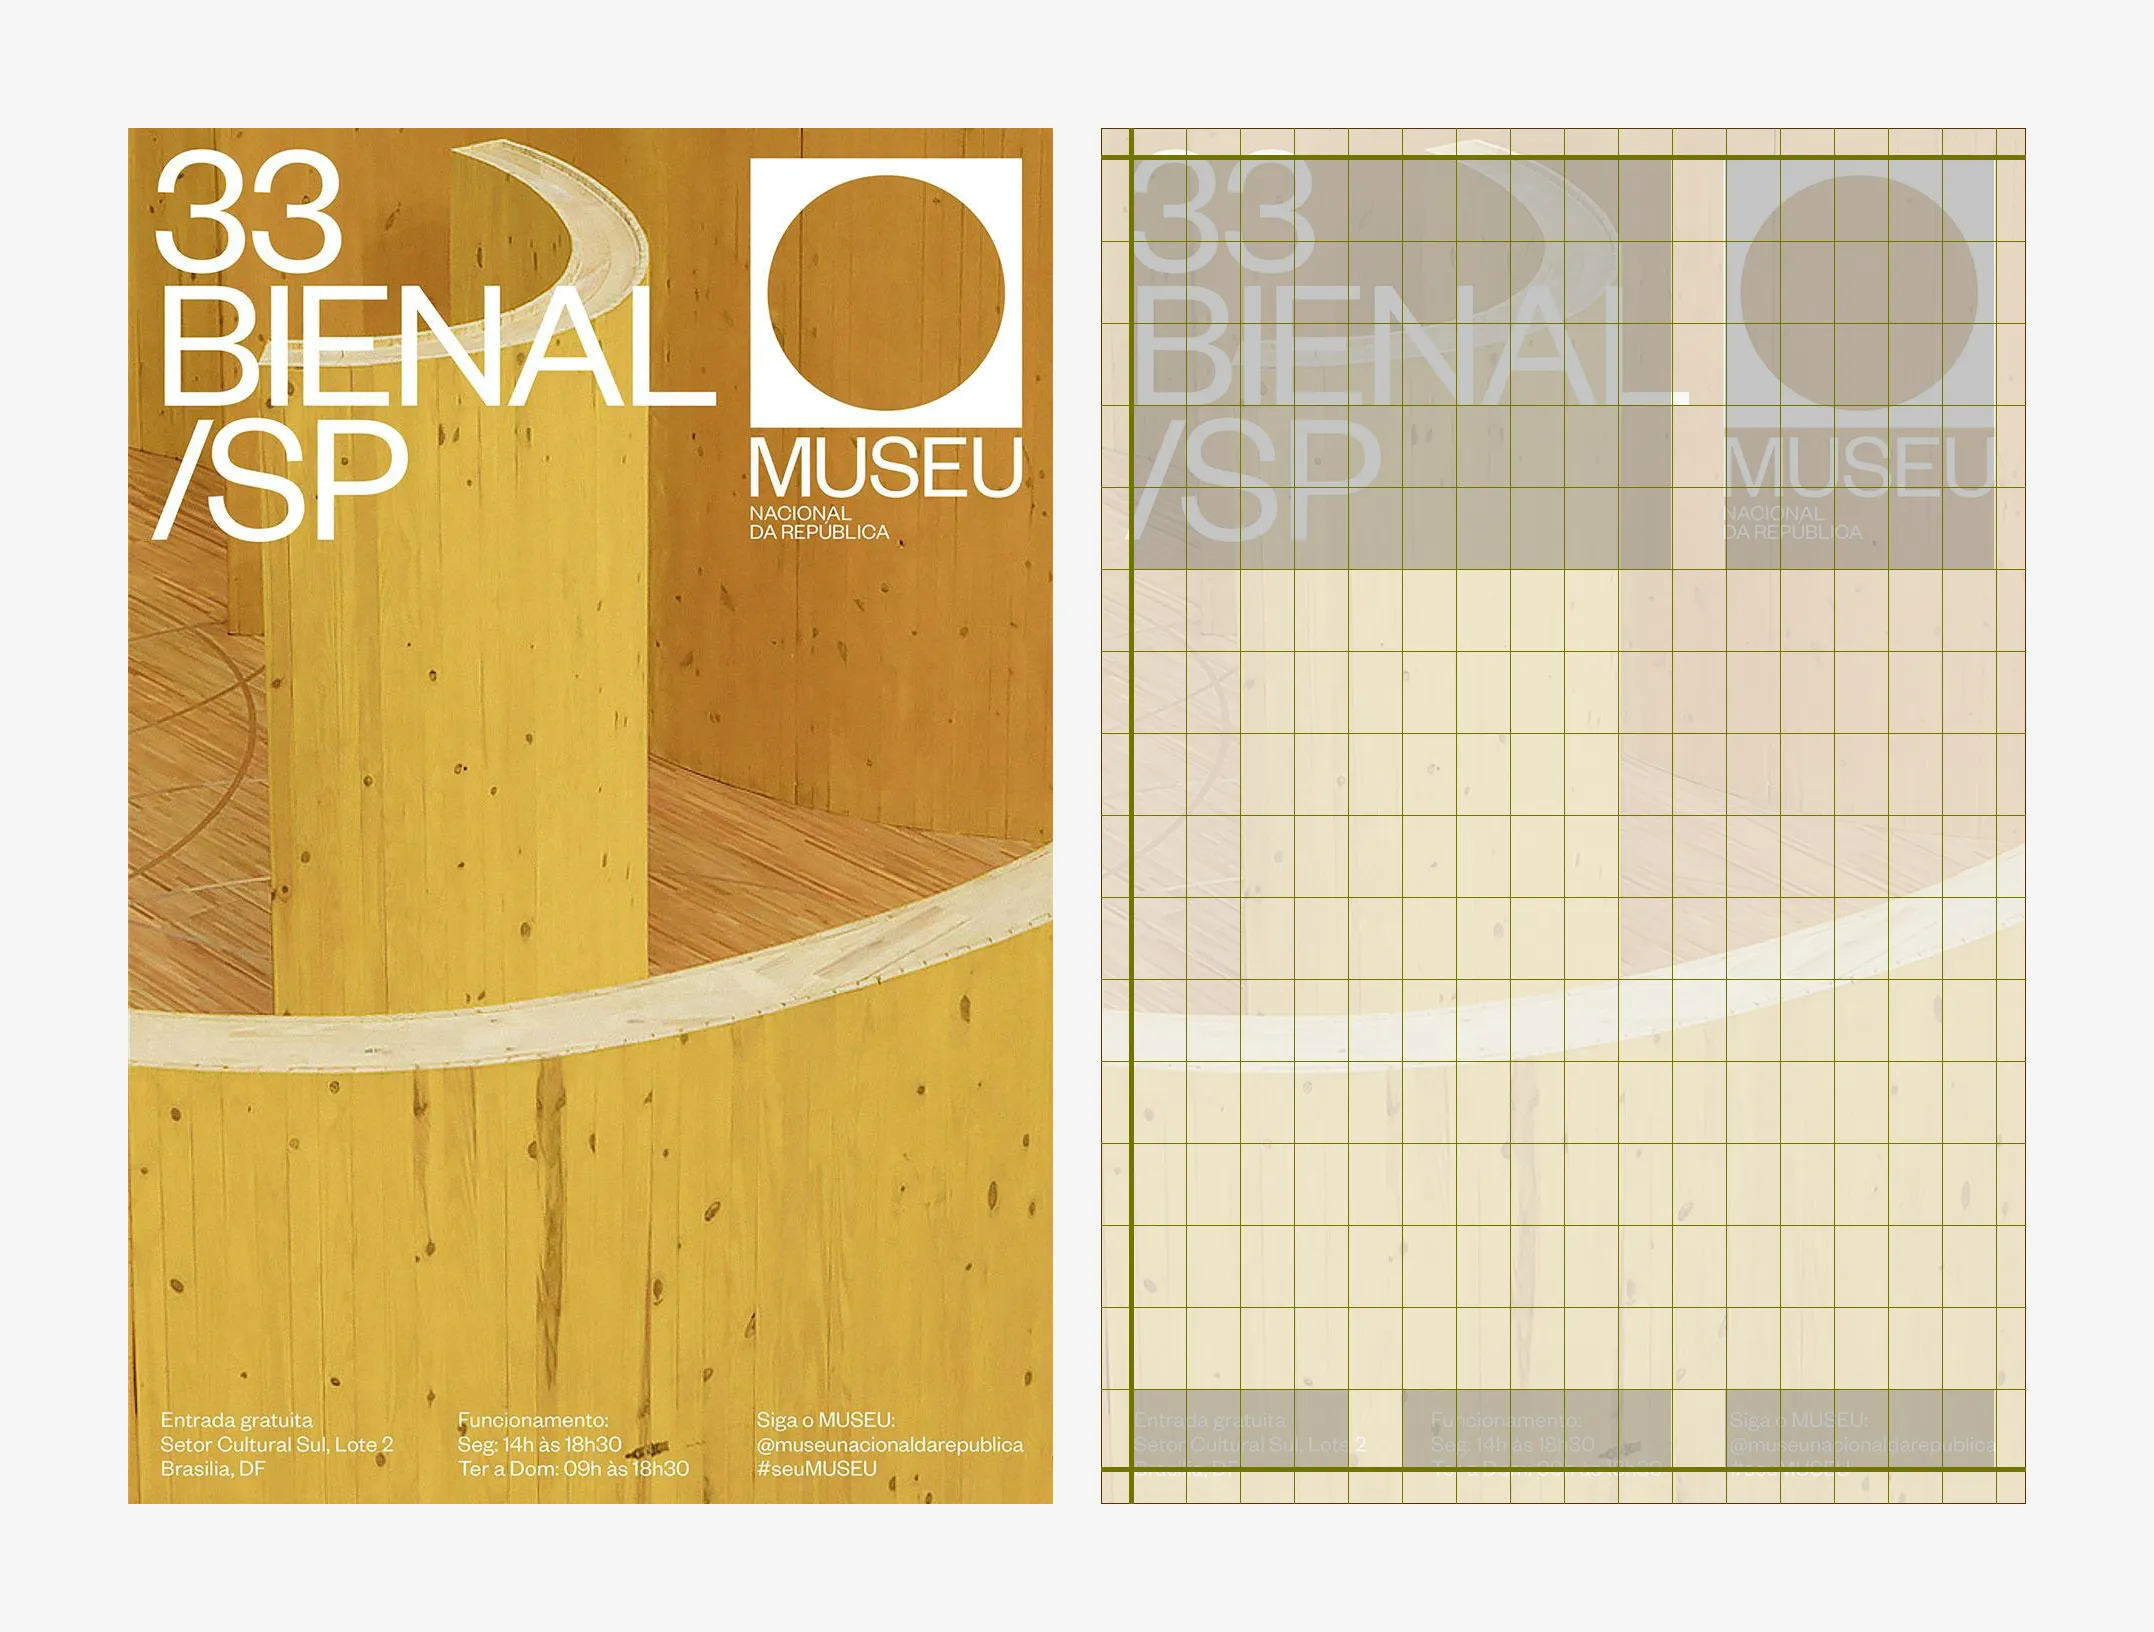
To show what I mean, I overlaid grids on the above two real posters (not flyers, but the same lesson applies). Look at how the title, event details, and logos all sit along the same invisible lines. Neither layout is complicated, but both are clearly considered.
Here’s a before and after I mocked up that hopefully makes the point even clearer:
On the left, every piece of information is centred, set in all caps, and fighting for attention at the same visual weight. It’s a list, not a design. On the right, the same bar has a clear headline, the details are grouped into columns, and a single image sets the mood. The content is almost identical, but the structure changed, and with it, the entire impression of the brand.
The practical version of all this? Before you start moving things around, decide what’s most important on your flyer. Place that first. Then let its edges guide where everything else goes.
2. White space
Take note of yourself next time you scan a magazine, a billboard or a bus stop ad. Which ads do your eyes naturally land on, and which ads do you actually read? I’ll bet you read at least the headlines of the ads that have more white space.
Like in all print design, empty space on a flyer is never wasted space because it’s there to make the important elements readable. Put simply, white space helps the reader digest your message.
Margins are one of the most underrated types of white space. They’re the safe area where key information should sit, and they protect your content from running off the page. We all know how important it is to the reading experience to have margins in a book, right? Why should a flyer be any different?
Two designs could have the same amount of white space, but one could look messy and the other could look clean and intentional. The key is how that space is organised.
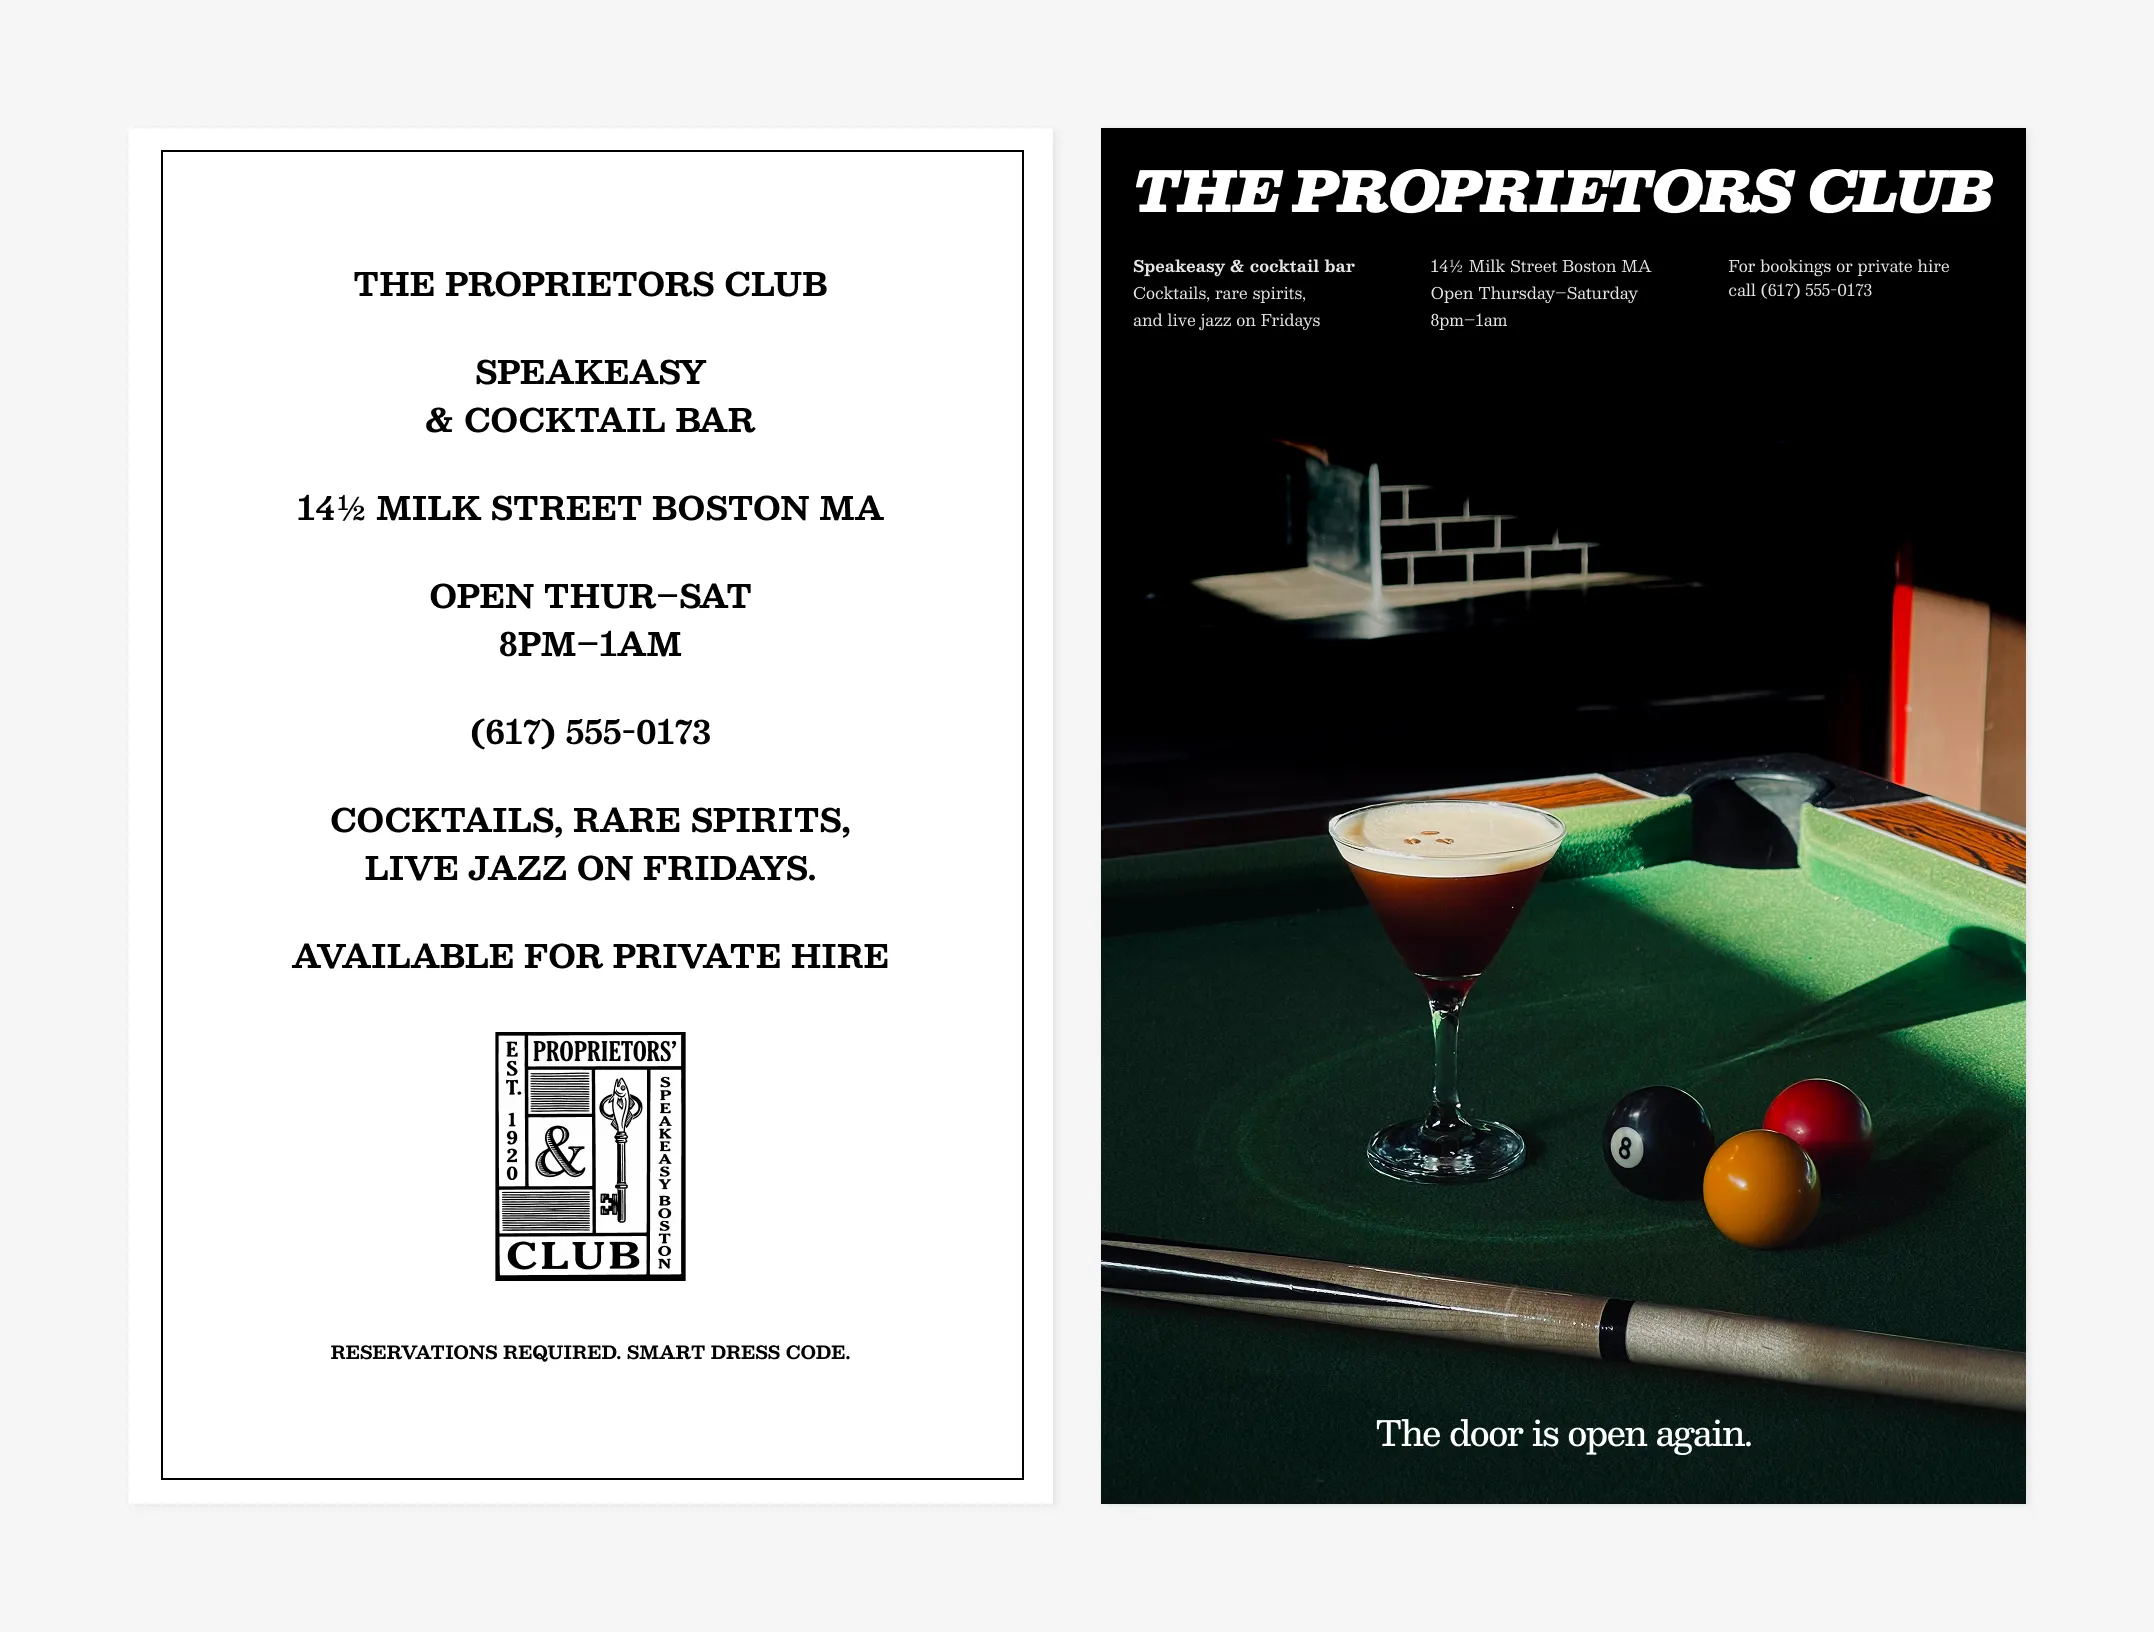
Look at these two flyers:
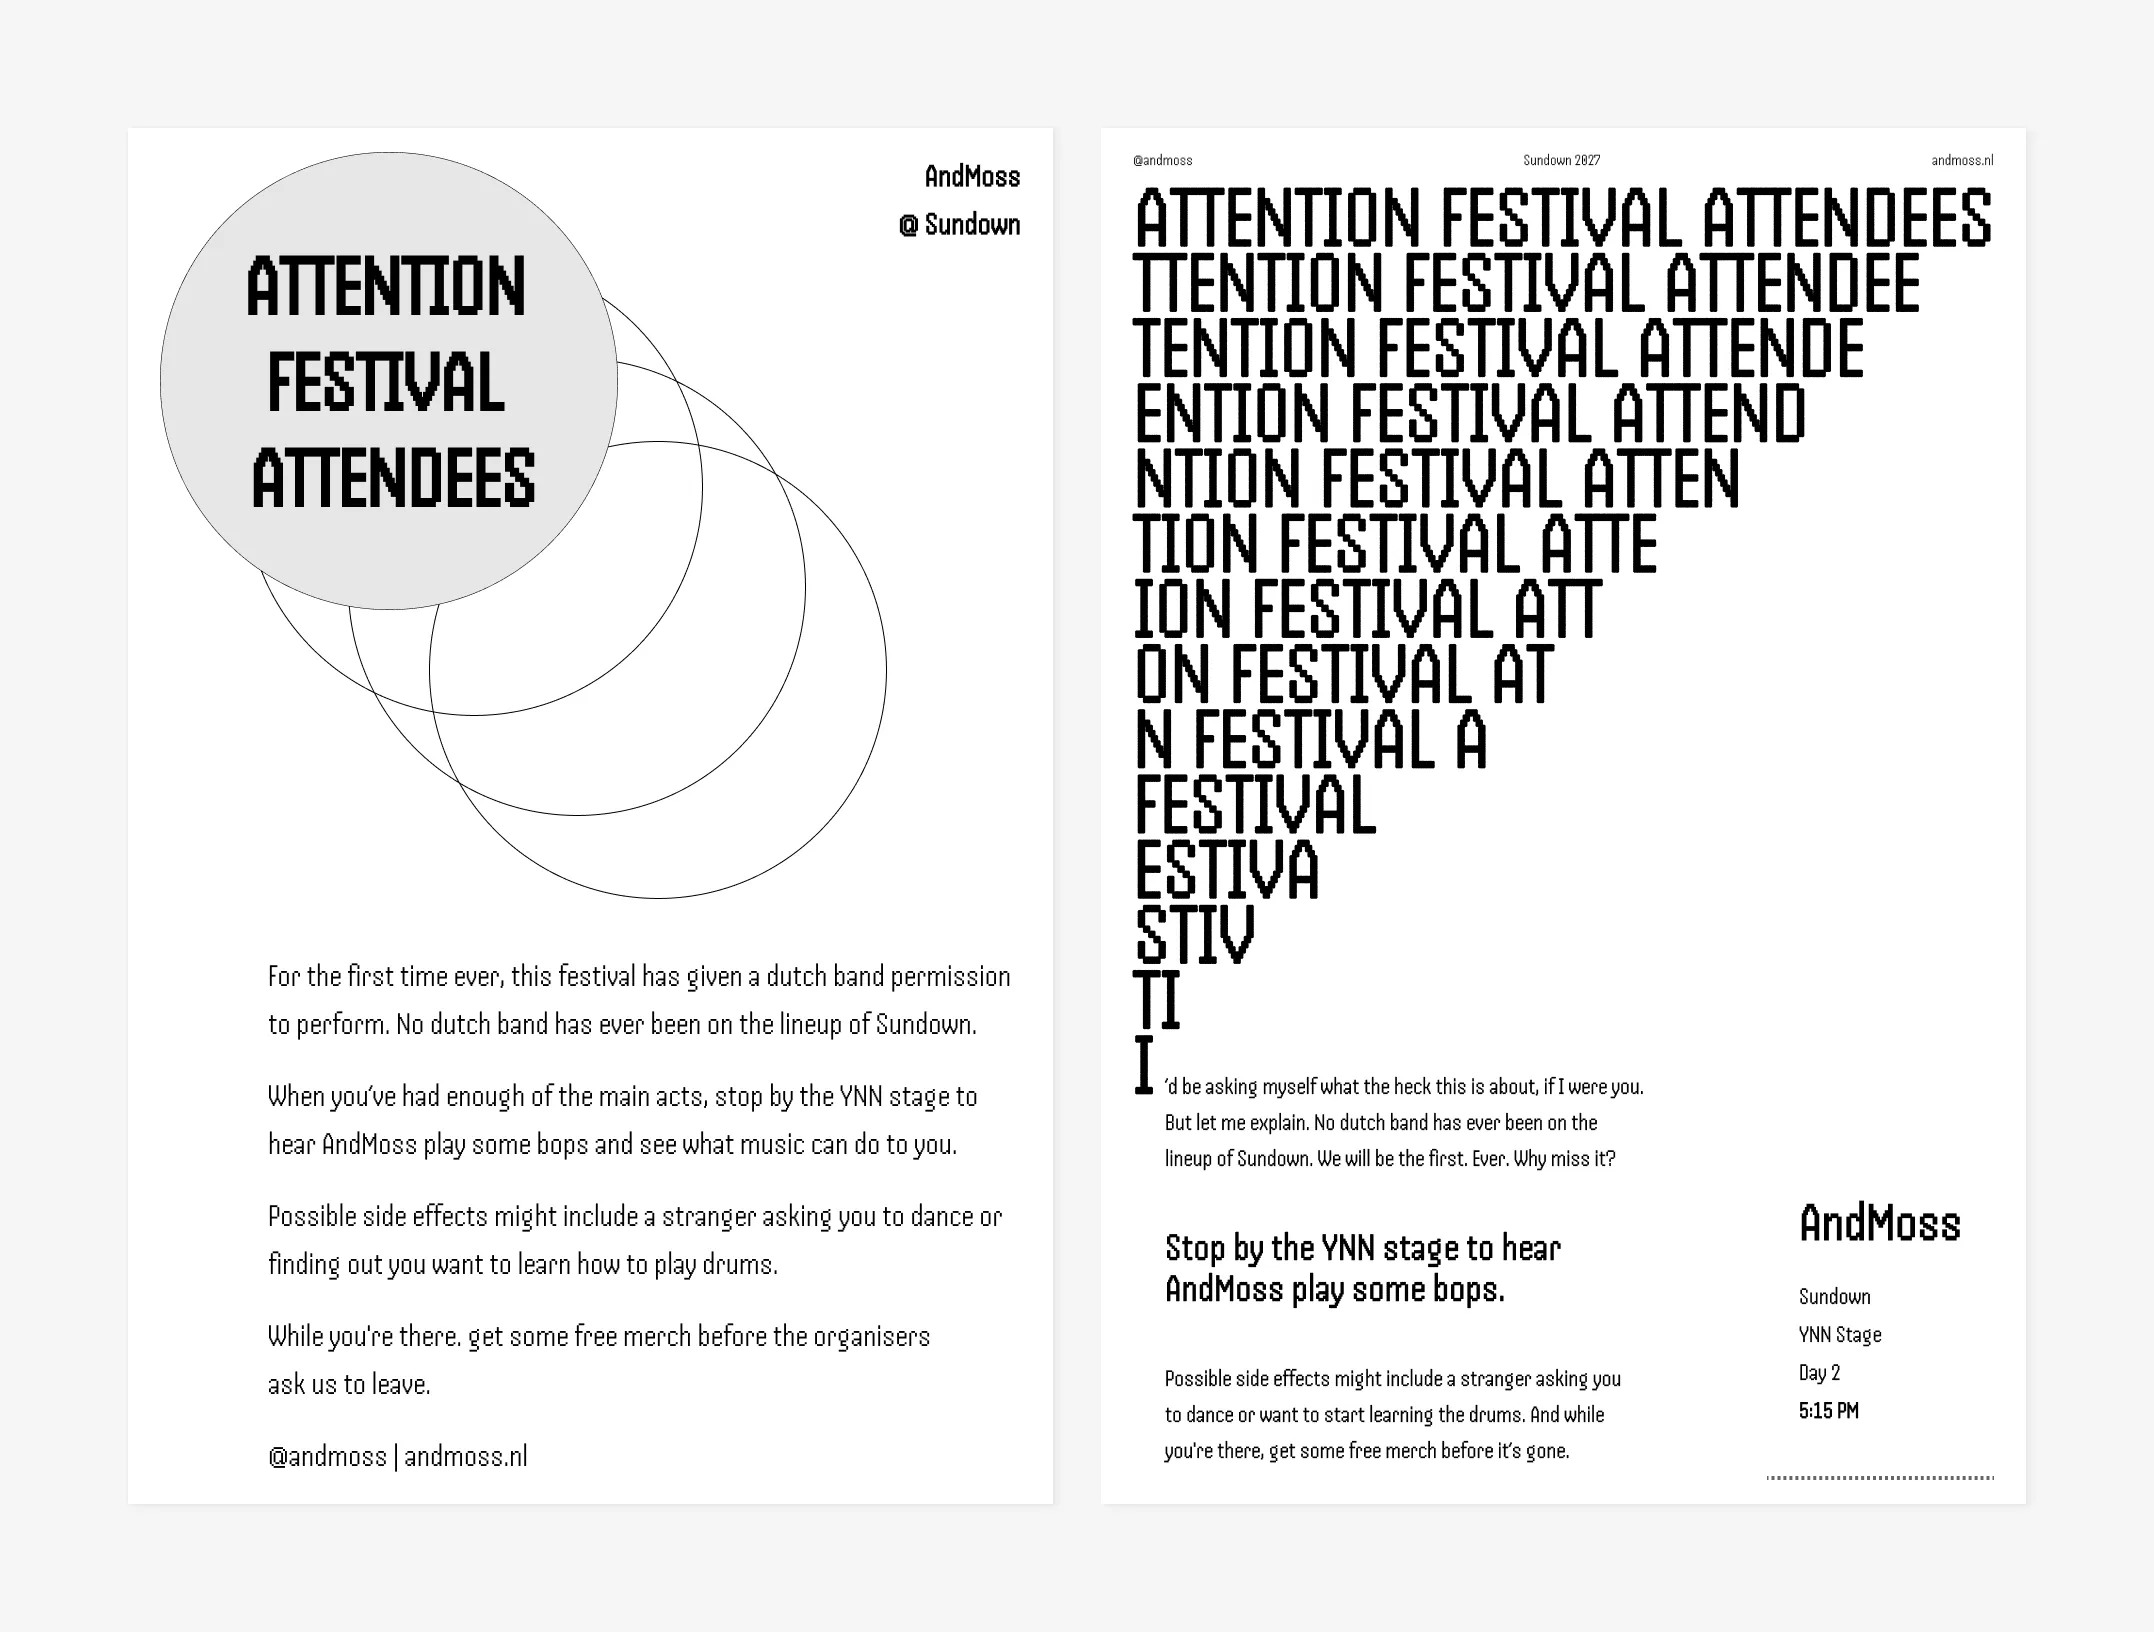
The one on the left has white space, but it’s trapped between elements that have no clear relationship to each other. The one on the right, while not perfect, uses that same space with more purpose. The cascading headline undeniably grabs attention, leading the eye to the body copy—which has also more room to breathe—and the practical details, even if small, are stacked cleanly on the right where they’re easy to spot. Almost the same information but completely different energy.
If you’re struggling with leaving enough white space in your design, it might also be because you’re trying to say too much. A flyer is not a 4-page brochure. It only needs one clear message and one call to action.
3. Safe printing areas
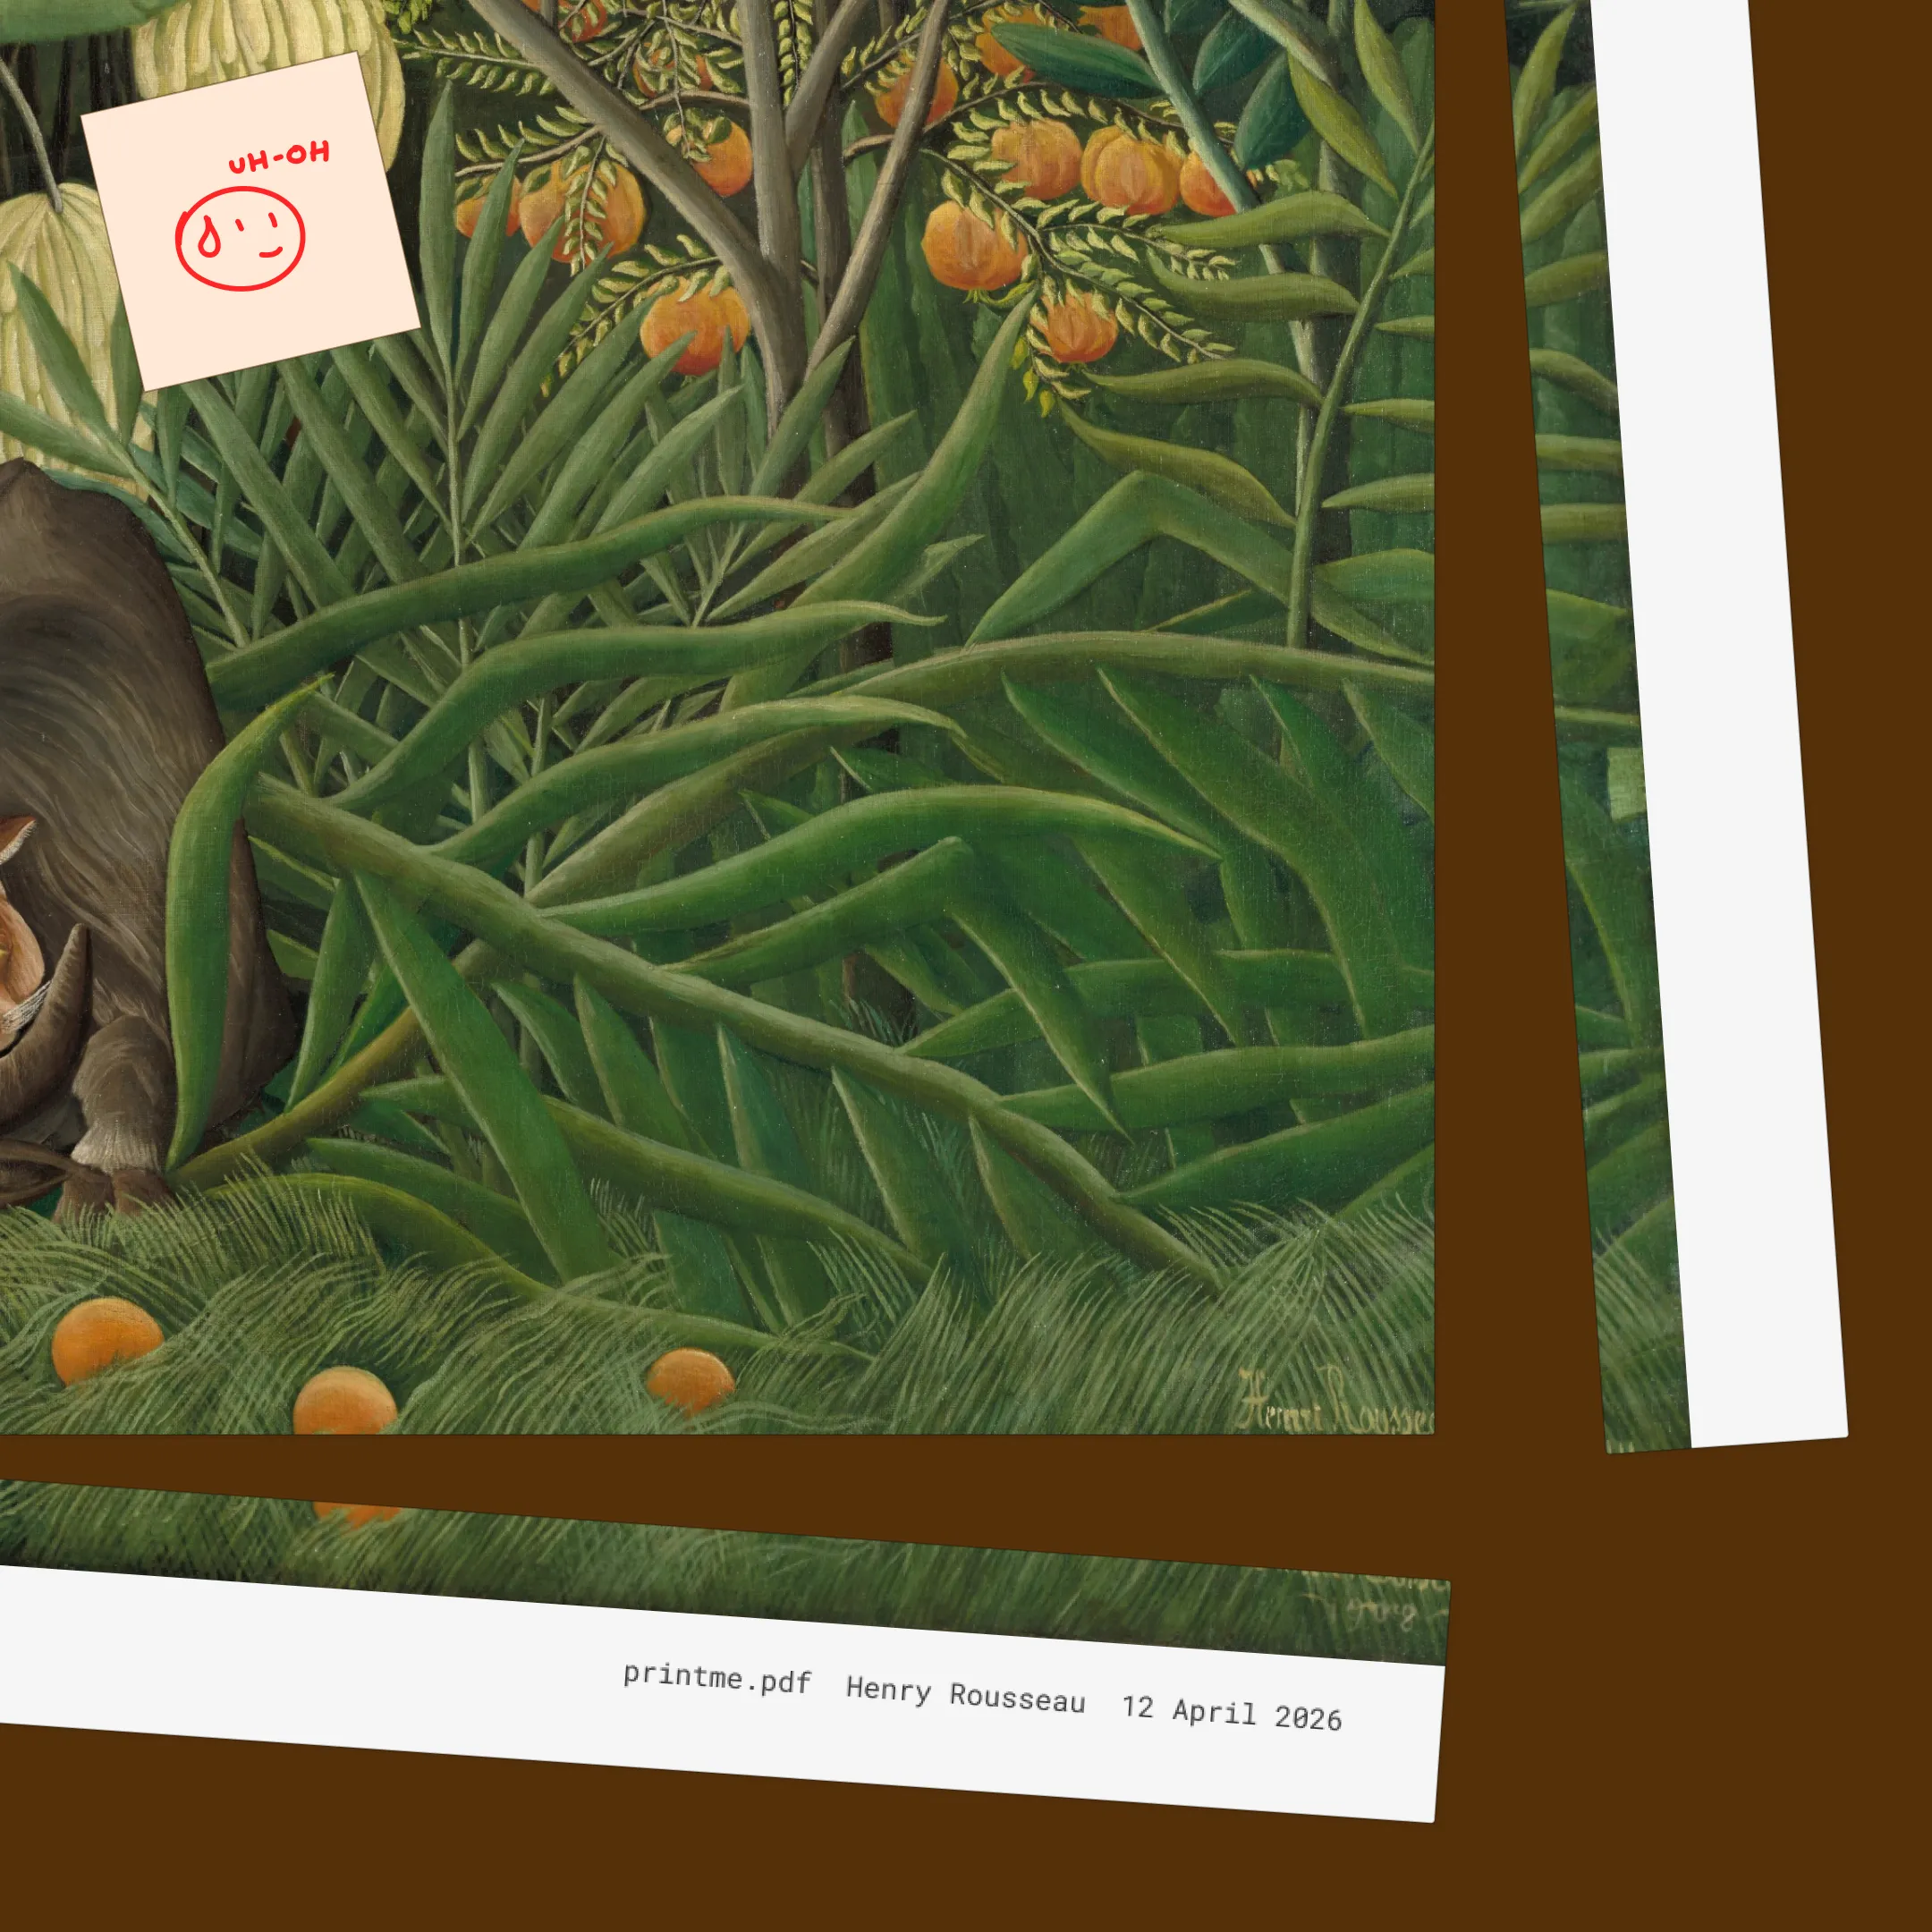
I spotted an eye-catching flyer while waiting in line for a coffee the other day. It was for a local counselling service. It had a lot of copy, which makes sense for something like that. It also had that unmistakable Canva template look. But praise where praise is due, it caught my attention. I picked it up.
On my way home, I looked at it again and noticed a thin white border running along the right-hand side and the bottom. Suddenly, a service that I had thought was trustworthy started to seem just ever so slightly more questionable.
Would this mistake have put me off following up if I were truly interested? I’m not sure. But imagine if I then went to this person’s website, found out they were charging £££ for a session and noticed their website was chaotic. Now that’s two red flags. Suddenly, I’d be second-guessing if this was worth the price.
See where I’m going with this?
That white border is a printing problem that could have been easily avoided by keeping in mind something that designers lovingly call, ahem, bleed.
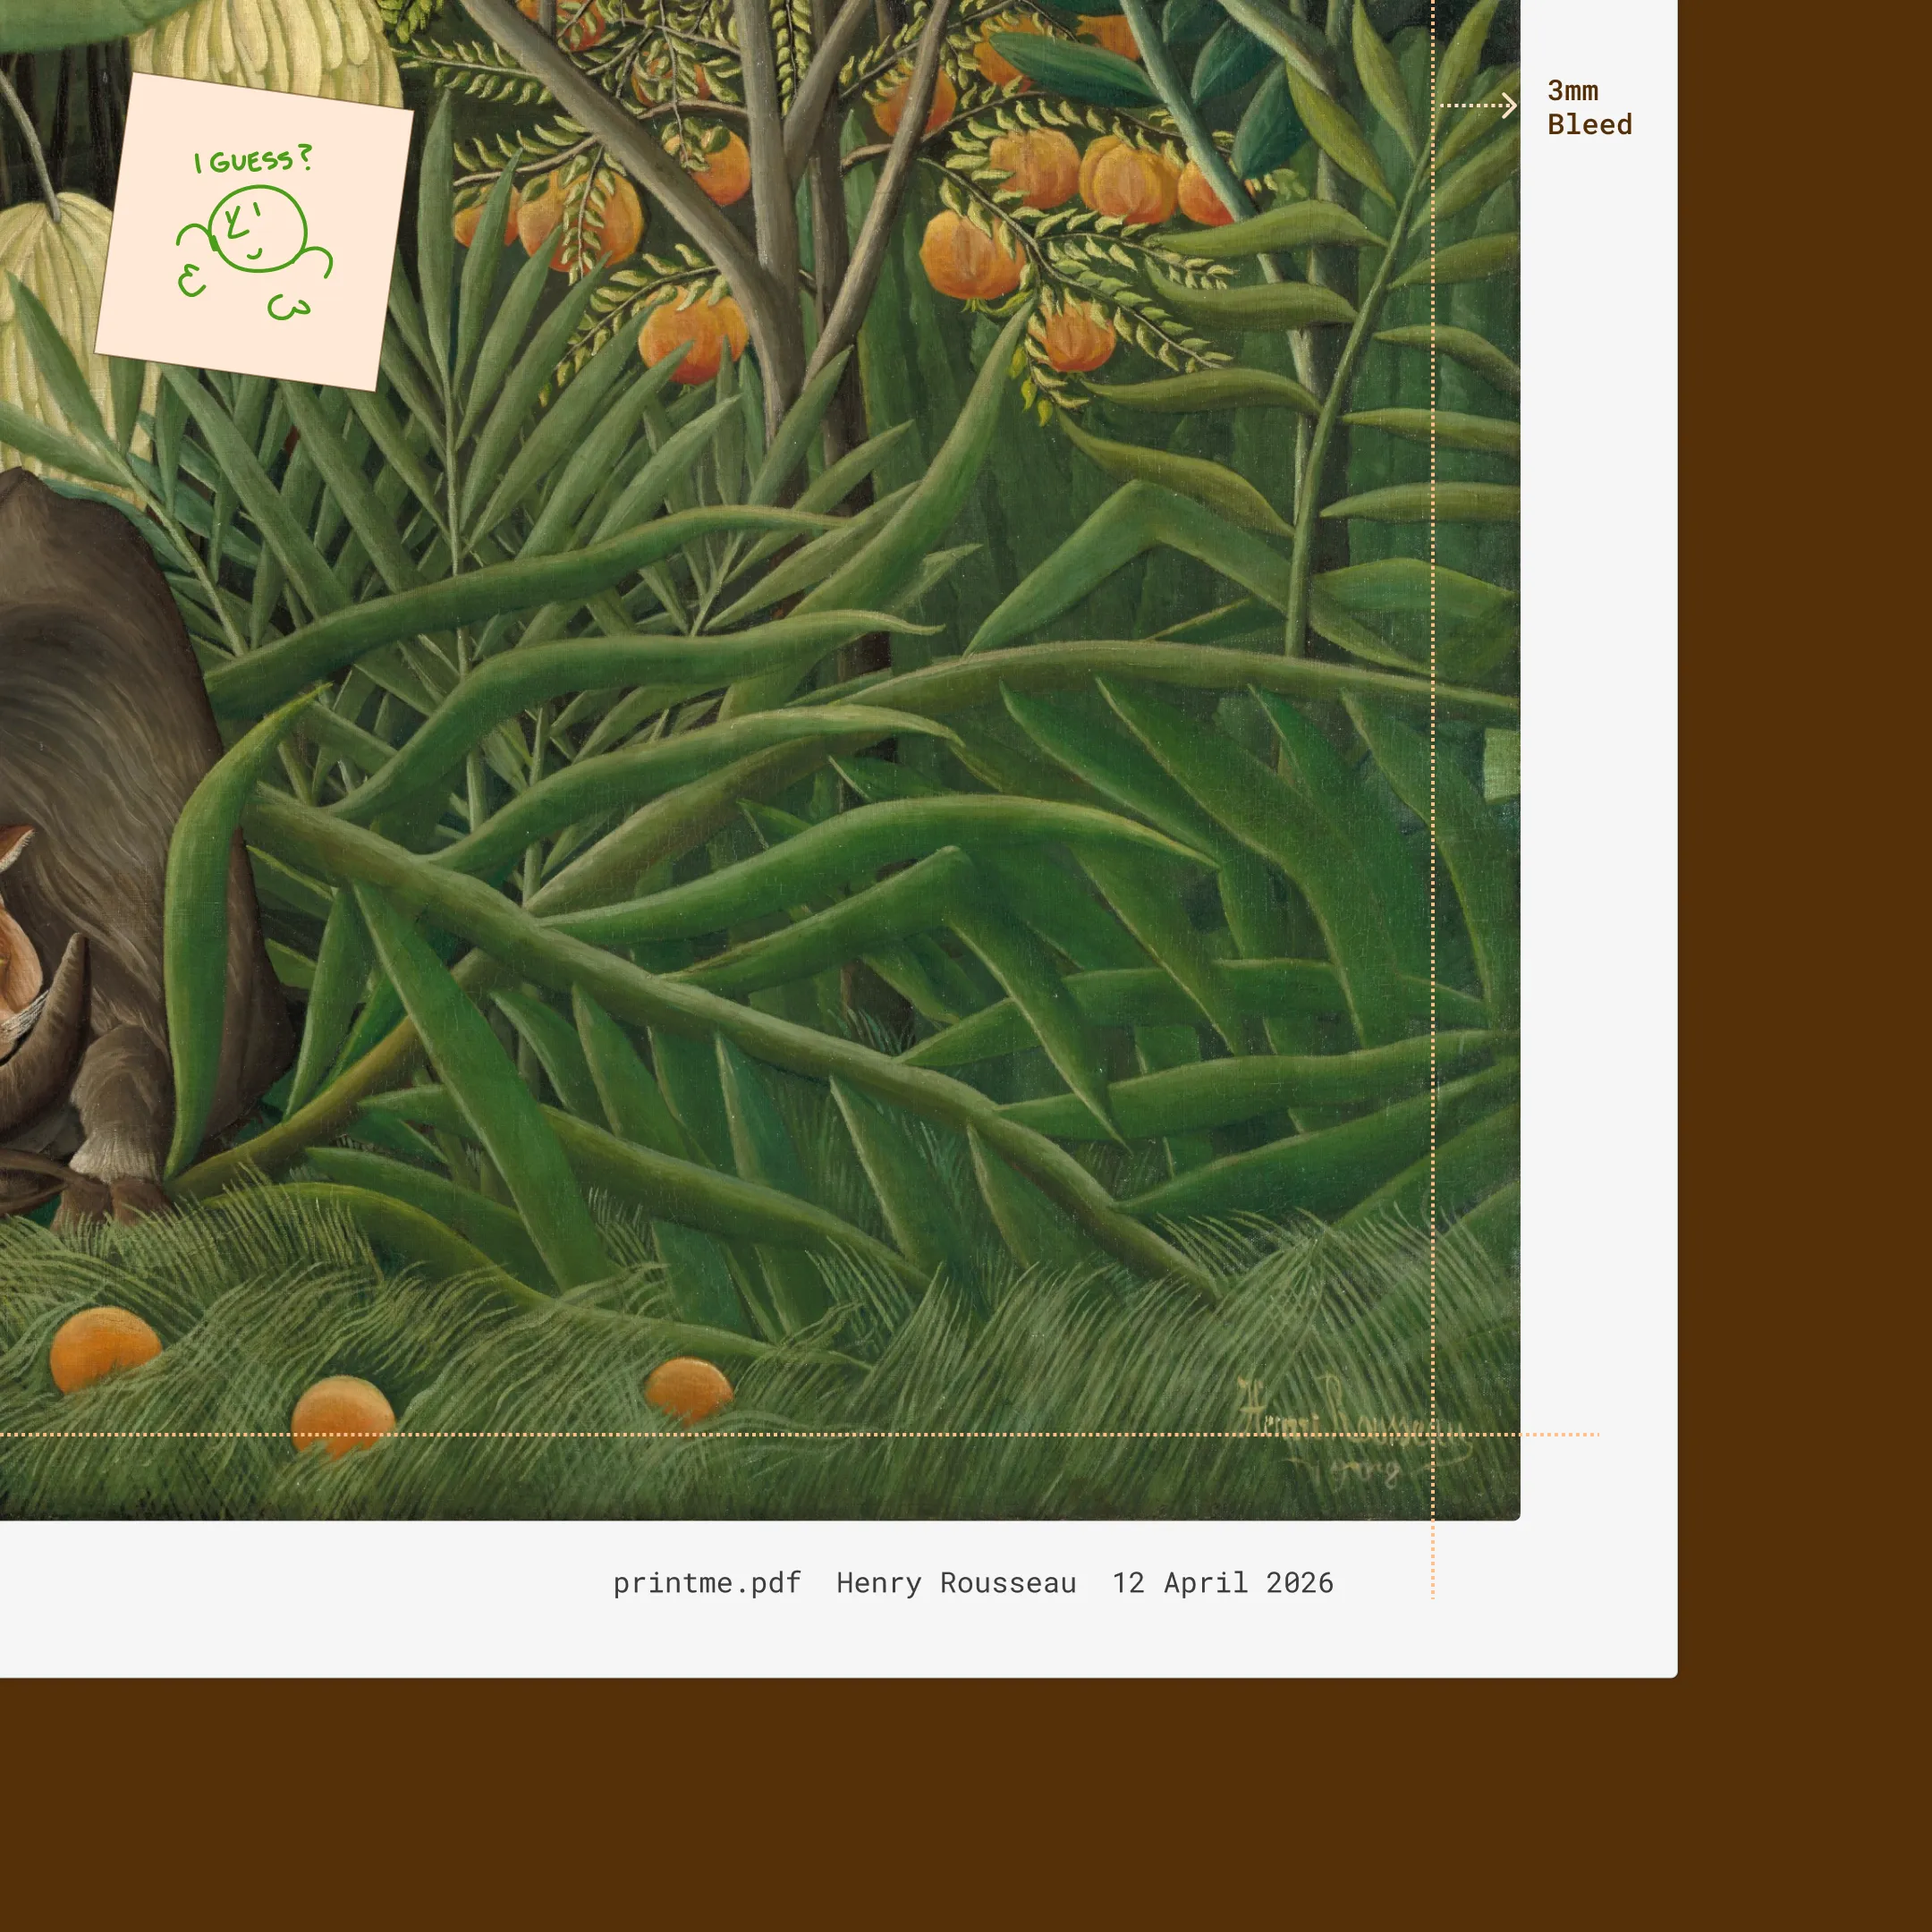
To add bleed, you effectively extend your design slightly past where it’ll be cut. The standard is 1/8 inch or 3mm on each side.
You can think of bleed as an outer margin or safe zone that exists to give the printer some wiggle room to make mistakes. What do I mean by that? In the simplest terms, no printer can print all the way to the edge of a sheet. The machine grabs the paper by its edges to feed it through, and it happens at very high speed. Because of this, alignment is never perfect.
If your design stops exactly where the paper ends, you’ll get uneven white strips after trimming. On the other hand, if you place your content too close to the edges, then scale it to fill the bleed area, you might cut off important parts of your artwork like in the example below.
I won’t walk you through the steps to add bleed on your platform of choice as there are plenty of guides out there (I’ll link Canva’s guide below). The important thing is understanding why bleed exists, so you remember to check for it before you send 300 copies to print.
Guidelines are your friend, but let’s not forget that we’re talking about flyers—things you print at the local shop and pin to a notice board. Of course, while you want them to be digestible and meaningful, a little pizzazz wouldn’t hurt either. And you can’t get pizzazz unless you risk a little and let yourself have fun in the process.
Need some inspo? Here’s a collection of bold and audacious flyers that I’ve recently started.
And if you want to go deeper, here are four graphic design resources worth bookmarking:
Be the first to hear about new posts, projects & experiments
Very occasional emails but always worth reading. Your inbox is literally drooling at the idea.
You agree to receive updates and consent to the Privacy Notice.